
Are you well rested and ready for the adventures with Alice?
But White Rabbit tells me that it is still winter down there and the landscape is covered in snow… ack, more snow! …time to put away our flip-flops and grab those snow boots.


one route leads to Russia and another to Paris


I wanted to use Atelier Akiko stripe as a border but I didn't had enough and couldn't find it online anymore. Then I suddenly remembered having a piece of Alice fabric and thought it would be fun to weave the routes in the rabbit hole with lines in the border to accommodate for the wanderings of under land creatures. I enjoyed fussy cutting the pieces and putting them back like a puzzle.

This quilt is loosely based on the pattern given in American Jane’s “Quilts for all seasons” book and is called "Fiesta wear". It uses strip-piecing method and also a very different way for joining the blocks which involves trimming for every two blocks that are being put together. It leaves a seam running diagonally through the solid brown blocks which I wasn’t keen about.

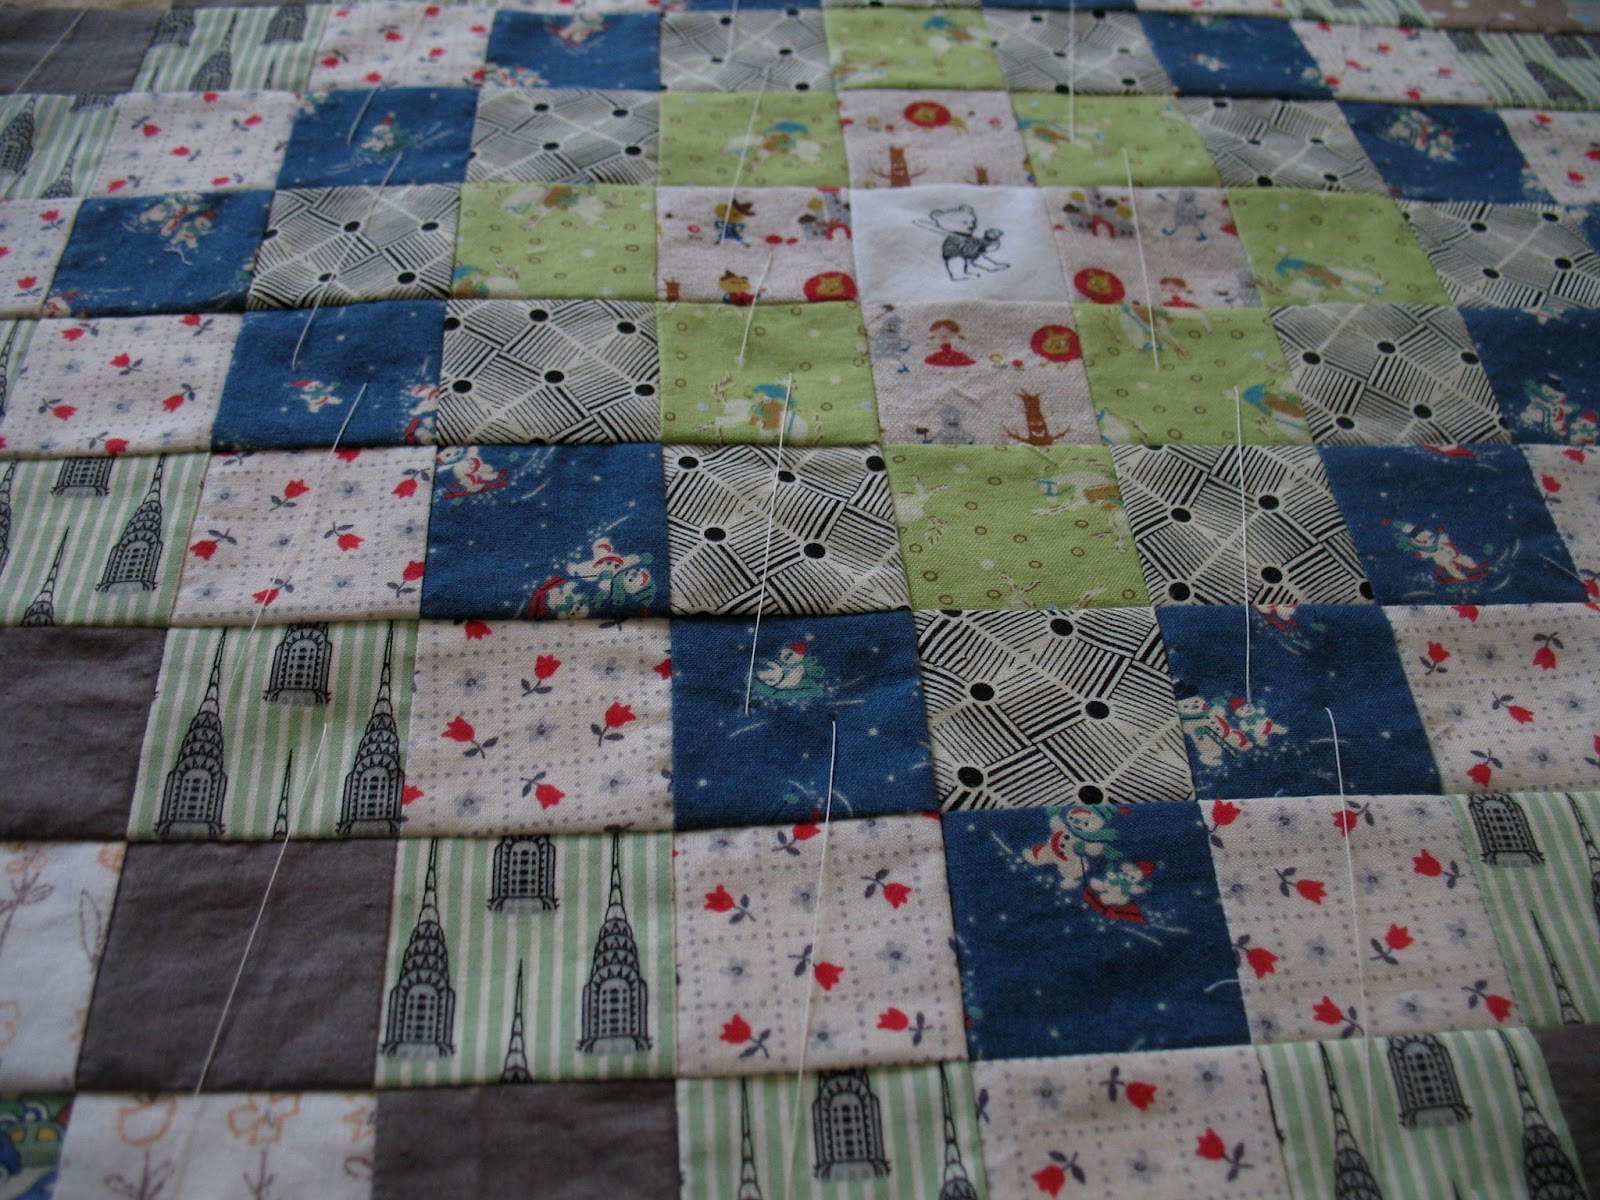
Instead, I drew the pattern on a grid paper to figure out how many blocks I could get in a row and divided it into 7 x7 squares per block with the last bock in each row being 8 x 7. I simply transferred one block at a time onto a small cork board and stitched those pieces carefully and pinned it back on the design wall. I continued like this for the rest of the blocks.
In the next step I sewed 2x2 blocks together to make bigger blocks. Then I sewed all these blocks together row by row. Finally, I joined the rows to make the quilt top.
The pattern in the book also suggested a pieced border with more squares but I opted for a simple border.
 I like to share a tip if you are looking for temporary solutions to a design wall. Until now I was only using the floor as my design wall and got away with it. For this quilt I felt it is impossible to keep track of so many pieces floating on the floor.
I do my sewing in our dining room and I was not comfortable putting nails in the wall or making permanent alterations to the space, so I got these transparent Command hooks and stuck them in a row on the wall. Then I fastened some old curtain ties to one edge of cotton batting with safety pins and hung the batting on the wall using the hooks.
After all the squares were up, the batting must have weighed like a ton, but the hooks didn't come off the wall at any point.
Thank you for joining me on this adventurous trip. Hope you weren’t disappointed about the Mad Hatter and his mates missing. We should have our own tea party sometime, don’t you think? ( " _ " )
I’ll be back tomorrow with rest of the pictures and details.
But White Rabbit tells me that it is still winter down there and the landscape is covered in snow… ack, more snow! …time to put away our flip-flops and grab those snow boots.

King of hearts

pack of cards
one route leads to Russia and another to Paris

Alice trapped in the hall and Alice talking to the Cheshire cat

but the tea-party is nowhere to be seen when we are dreadfully needing a hot cup of tea…sigh
I wanted to use Atelier Akiko stripe as a border but I didn't had enough and couldn't find it online anymore. Then I suddenly remembered having a piece of Alice fabric and thought it would be fun to weave the routes in the rabbit hole with lines in the border to accommodate for the wanderings of under land creatures. I enjoyed fussy cutting the pieces and putting them back like a puzzle.
This quilt is loosely based on the pattern given in American Jane’s “Quilts for all seasons” book and is called "Fiesta wear". It uses strip-piecing method and also a very different way for joining the blocks which involves trimming for every two blocks that are being put together. It leaves a seam running diagonally through the solid brown blocks which I wasn’t keen about.

Instead, I drew the pattern on a grid paper to figure out how many blocks I could get in a row and divided it into 7 x7 squares per block with the last bock in each row being 8 x 7. I simply transferred one block at a time onto a small cork board and stitched those pieces carefully and pinned it back on the design wall. I continued like this for the rest of the blocks.
In the next step I sewed 2x2 blocks together to make bigger blocks. Then I sewed all these blocks together row by row. Finally, I joined the rows to make the quilt top.
The pattern in the book also suggested a pieced border with more squares but I opted for a simple border.
 I like to share a tip if you are looking for temporary solutions to a design wall. Until now I was only using the floor as my design wall and got away with it. For this quilt I felt it is impossible to keep track of so many pieces floating on the floor.
I do my sewing in our dining room and I was not comfortable putting nails in the wall or making permanent alterations to the space, so I got these transparent Command hooks and stuck them in a row on the wall. Then I fastened some old curtain ties to one edge of cotton batting with safety pins and hung the batting on the wall using the hooks.
After all the squares were up, the batting must have weighed like a ton, but the hooks didn't come off the wall at any point.
Thank you for joining me on this adventurous trip. Hope you weren’t disappointed about the Mad Hatter and his mates missing. We should have our own tea party sometime, don’t you think? ( " _ " )
I’ll be back tomorrow with rest of the pictures and details.
3 comments:
How clever you are to come up with a handy design wall!!
I'm sooo loving this quilt! I have it on my list of 'to do' as well. Yours really inspires me!!
I love reading about your process from redesign to improv of design wall. You always create a wonderful story with your quilts. It's beautiful Pratima.
Oh my gosh. What a great idea - command hooks. I don't have a wall I can use permanently in my sewing room. They are all used up with shelves, cutting table, big window and double glass doors. So I need to have something up I can use for quilts like this. I've improvised without much success. I am going to do this! Thanks Pratima.
Post a Comment